Functions in Auto ModeMove machine to home positionStep 1: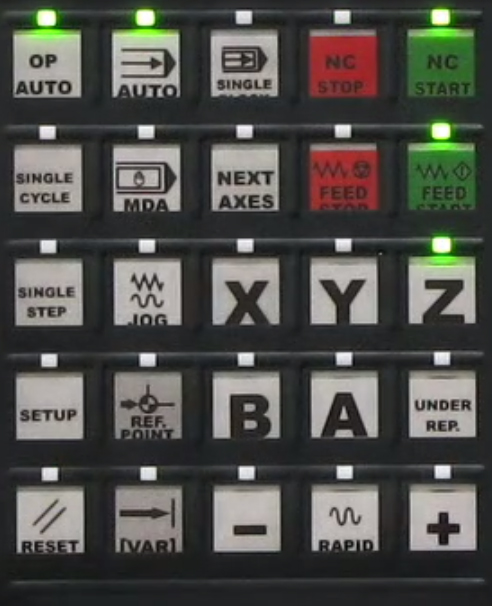
The home position is the defined starting point for many NC
programs. In the home position, the Z-slide is retracted and in the "Start position". Machining of the workpiece can be started from here.
Press OP Auto and Auto keys. Step 2:Press the Master Return key.
The lamp comes on when the home position is reached. Starting productionStep 1:Preconditions:
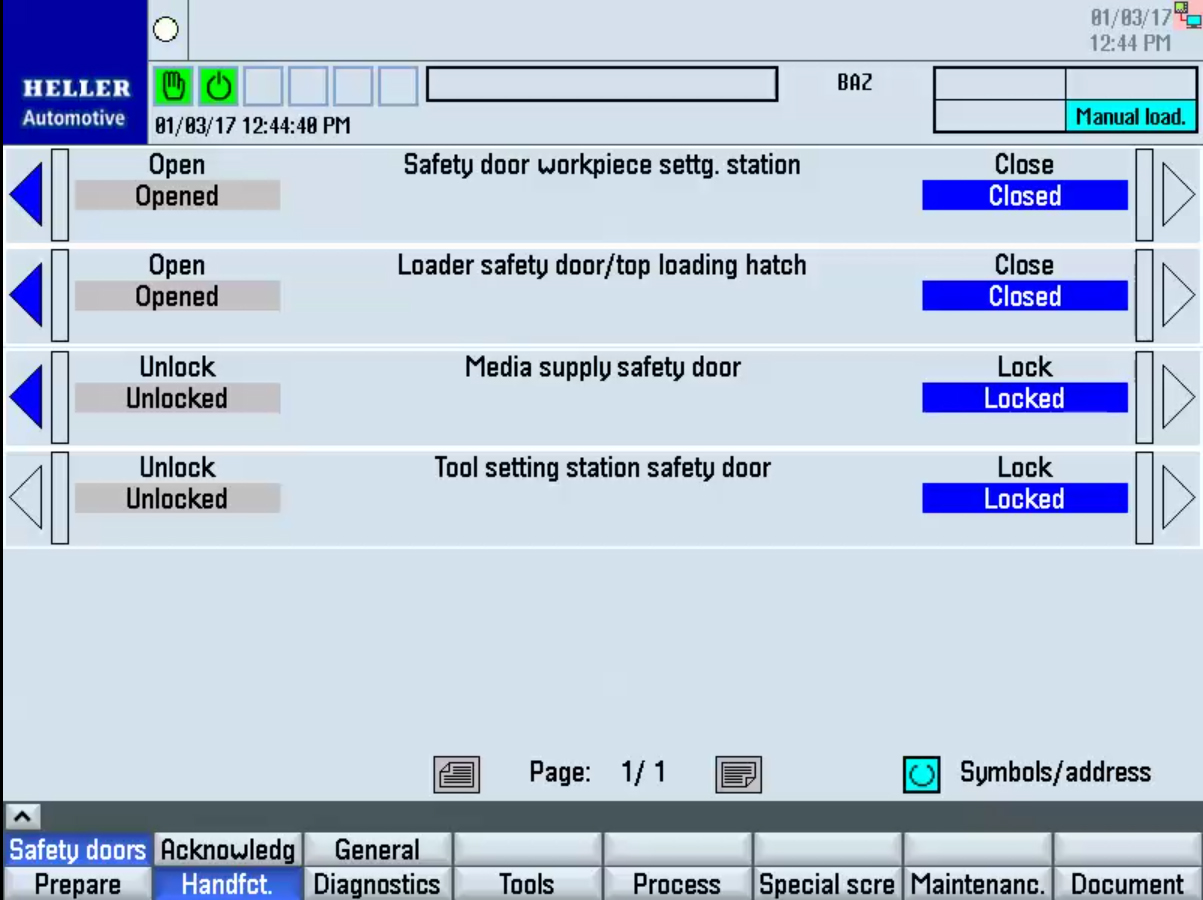
Press the Interlinked Operation Mode (OP Auto) key.
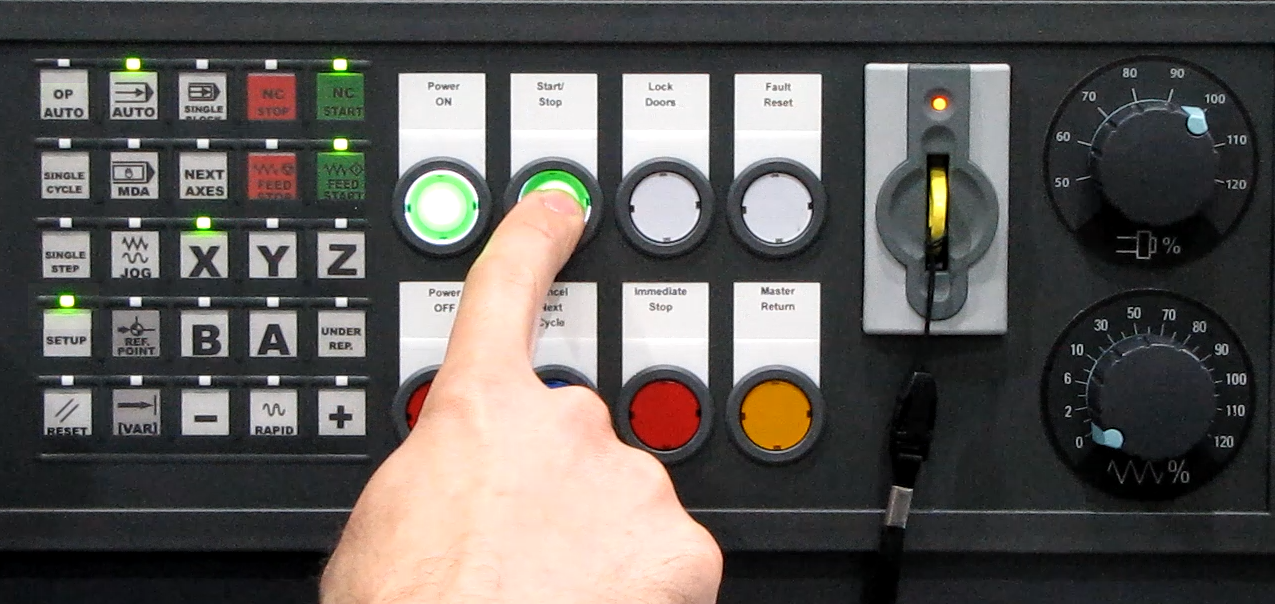
Step 2:Press the Start/Step key. Step 3: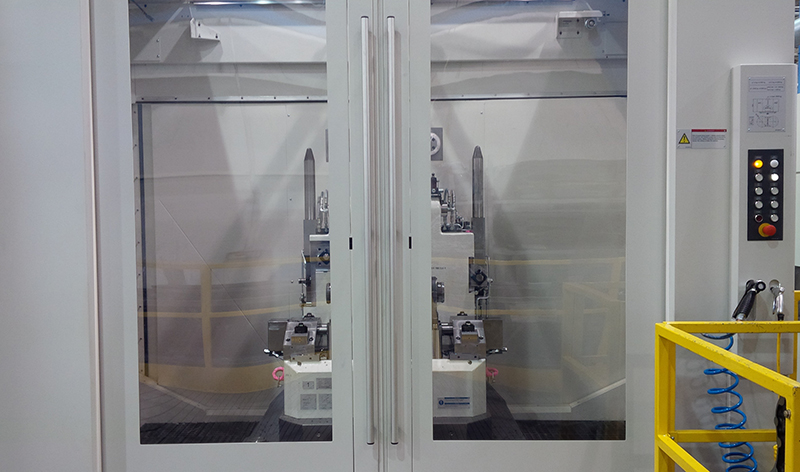
Preconditions: Step 4: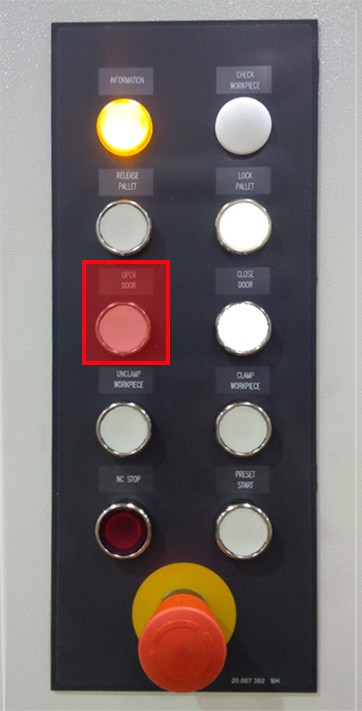
Press the Unlock/*open safety door key. Step 5: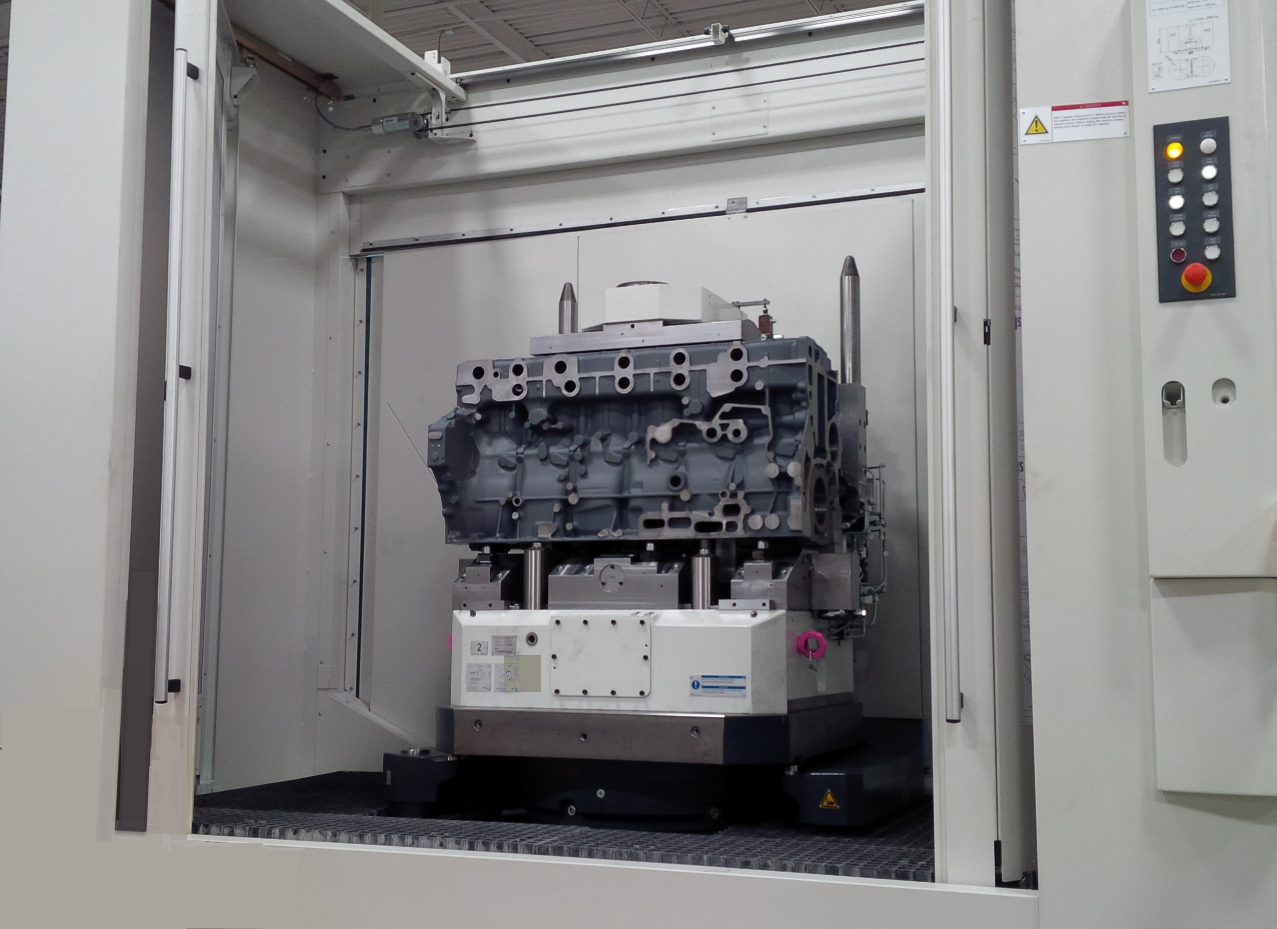
Place a raw part on pallet 1 at the setting station. Step 6: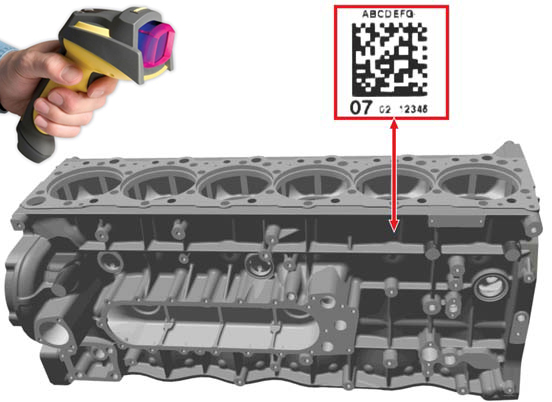
Read the data matrix code for the raw part (e.g. DATALOGIC Powerscan). Step 7: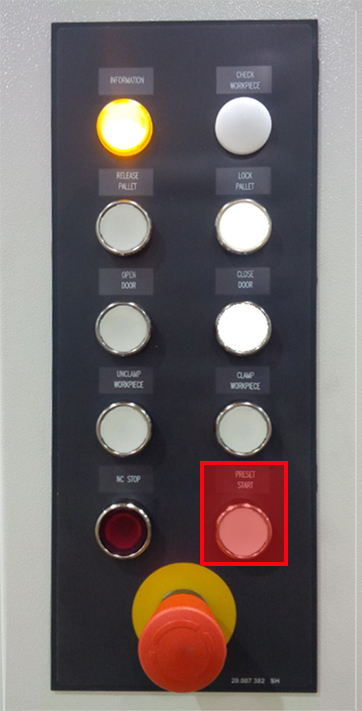

Press the Preset Start key. Opening the "General" HMI screenStep 1:Preconditions:
Press the Setup key. 
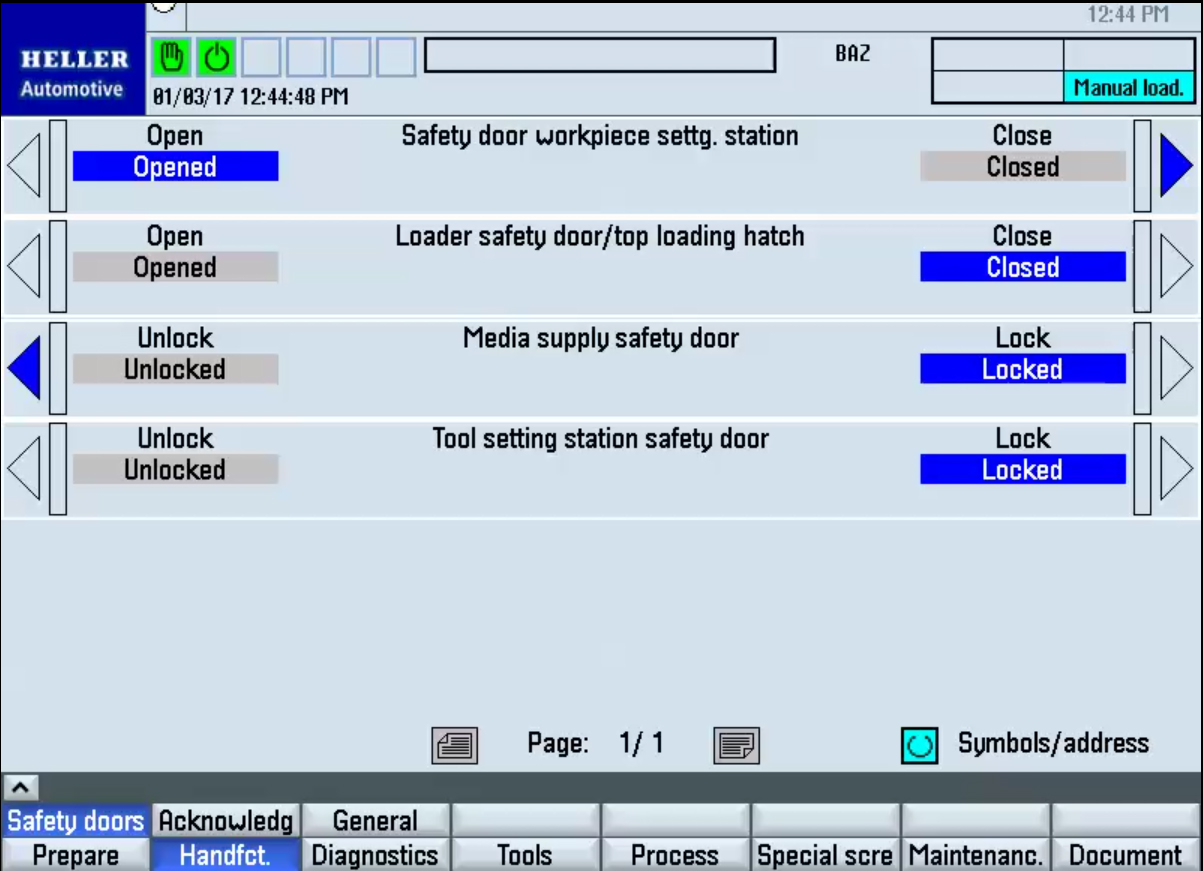
The machine is removed from the system linkage. Setup mode is activated. With Data menu key call up the basic menu on the main operator panel. Press the "HMI" softkey. Step 2:With Data menu key call up the basic menu on the main operator panel. Press the "HMI" softkey. Step 3:
Press upper horizontal softkey "General". Workpiece ChangeStep 1:Press upper horizontal softkey "WPC". Step 2:Unclamp Fixture Step 3:Open Front Door 
Step 4: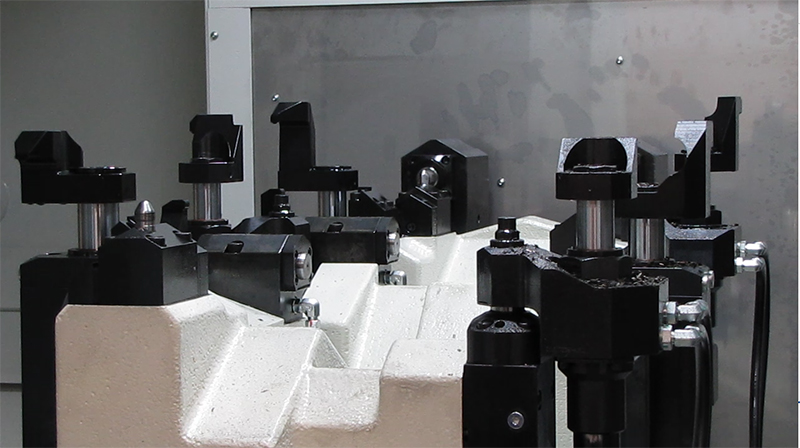
If necessary, blow off chips from the fixture rest points. Step 5:Close Front Door
Step 6:Clamp Fixture Step 7: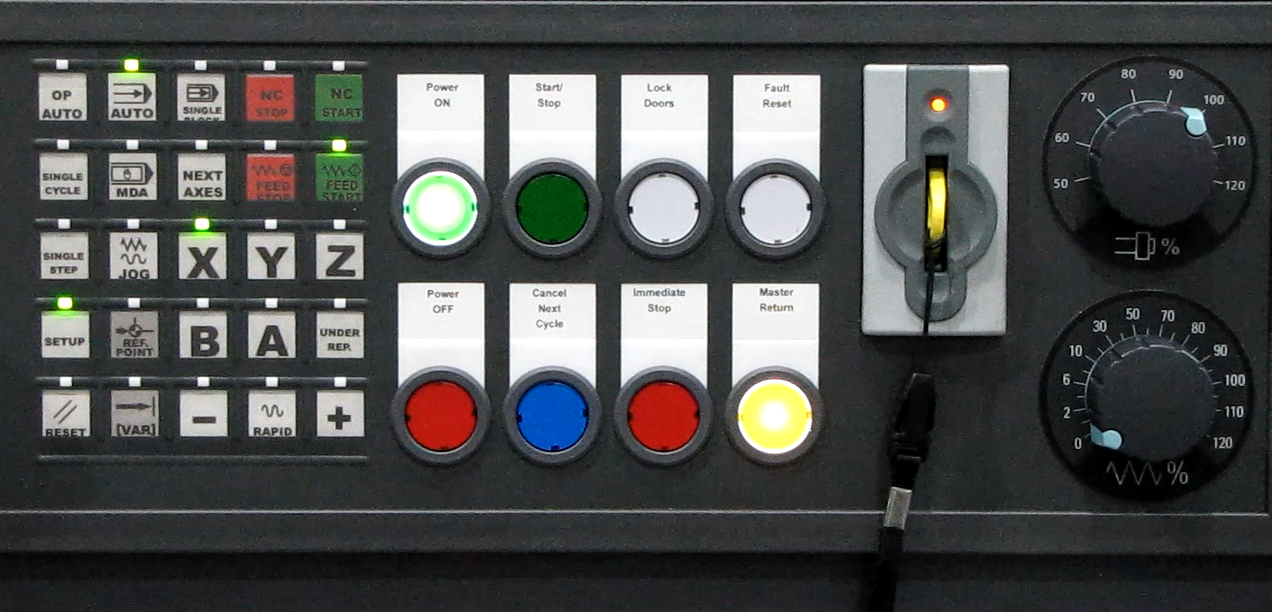
Press the Start/Step key. Basic informationThe warmup circuit enables a program to be started automatically
every weekday (including Saturday and Sunday). This allows the
machine to be run up to operating temperature before machining the
first workpiece. Damage to the machine and workpiece can be
reduced to a minimum and a high degree of machining accuracy
achieved in the initial stages of production. Open the "Warm-up program" windowStep 1:Preconditions:
Call up the machine's basic menu using the Data menu key. Step 2:Press the "Warmup" softkey. Edit modePrecondition: Setting timeStep 1
Use the Cursor keys to select the input field for the hours display of
the desired day of the week. Select warmup programThe following restrictions apply for the warm-up program: Step 1
Press Tab to select the "NC program" input field for the desired day
of the week. Step 2Press the "NC" softkey. Start Warmup programUse the Checkbox in the "active" column to switch the program for
the day of the week on or off. Step 1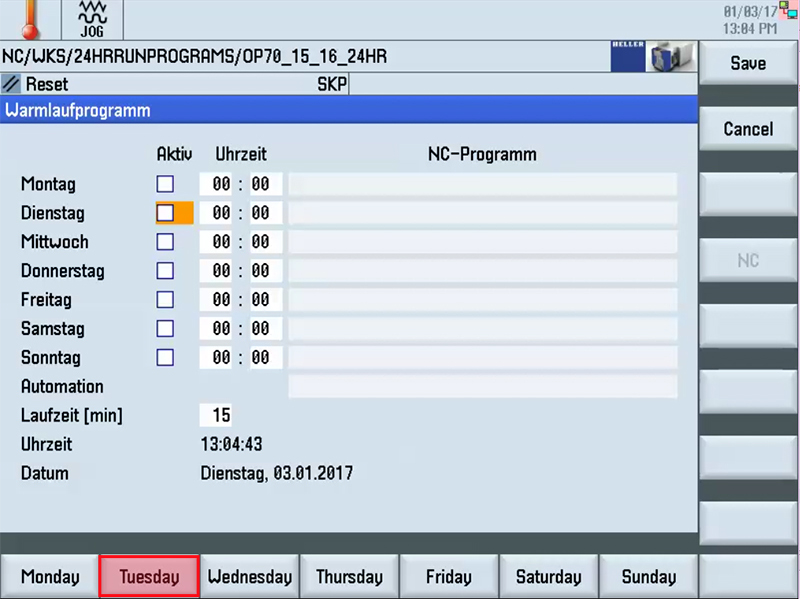
Edit mode is open. Step 2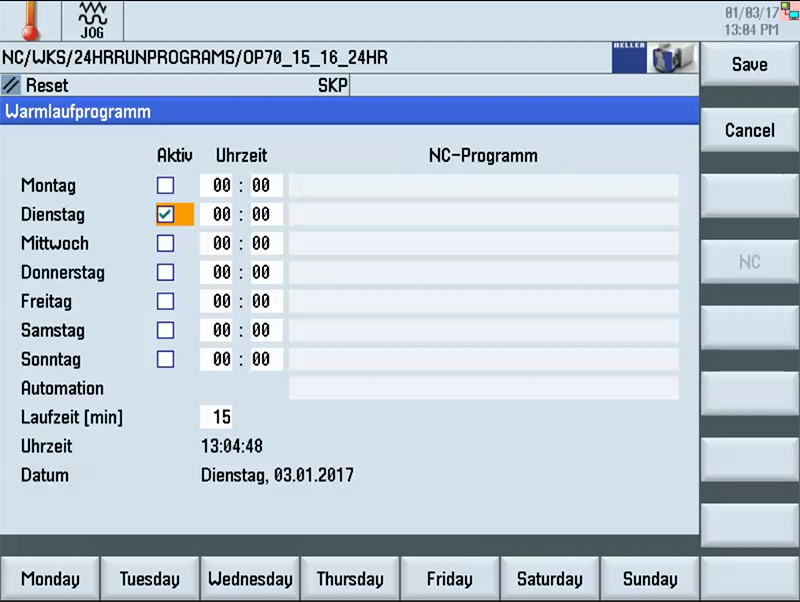
Press the Highlight key. Setting maximum runtimeStep 1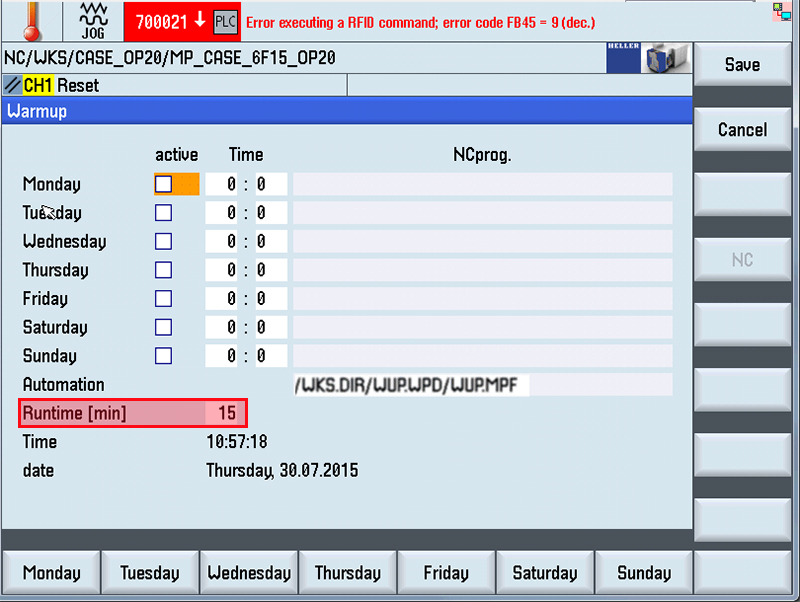
The duration of the warmup sequence is entered in minutes in the
"Runtime" field; valid values: Close edit modeStep 1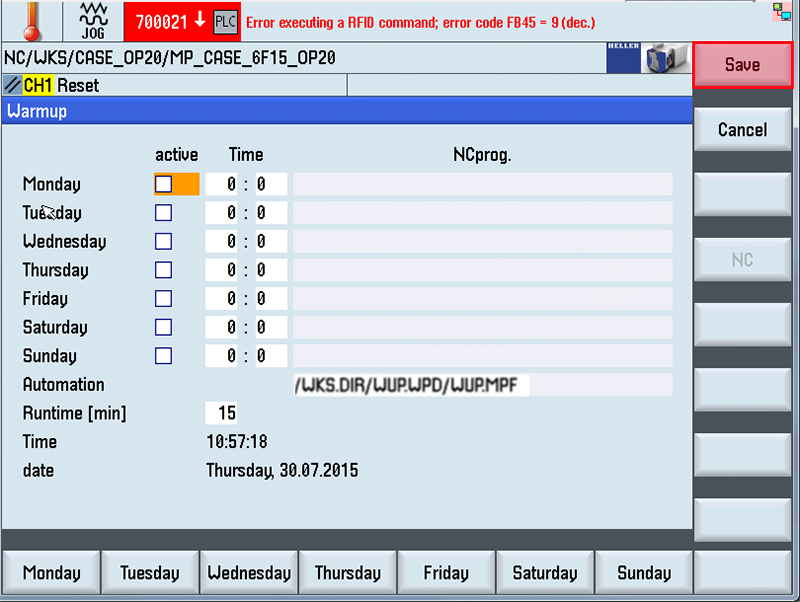
Press the "Save" softkey. Important HintsPressing the Reset button during warmup interrupts the program. Information on tool spindle warmupIn order to guarantee even distribution of the lubrication oil after
down times, you must prepare the spindle by warming-up. Start warmup programStep 1Preconditions:
Press the Master Return key. Step 2
Press the Setup and Auto keys. Step 3To indicate that a warm-up is currently running, the message "Warmup
program active - cancel with reset or automatically once the
setpoint time has expired at end of program" is displayed.
Normal mode is possible again only when the cycle type "Preselect warm-up function" has been deselected. Stopping the warm-up program manuallyStep 1The warm-up program stops either automatically or after the
specified runtime or via manual intervention. Step 2Switch-off warm-up function in the "Cycle types" HMI screen
("Prepare" area). Step 3Also press the Master Return key. Step 4Press the Start/Step key. |
 The basic menu is expanded in a horizontal direction.