Preventing the Safety and Maintenance Doors from ClosingSecuring Work Area Safety Door to Prevent Closing
As long as the work area safety door is not locked, the motors cannot be switched on. The escape button on the inside of the safety switch services as an escape release in case of emergency. When this button is pressed, the machine is brought to an EMERGENCY Stop and the work area safety door is unlocked. Step 1: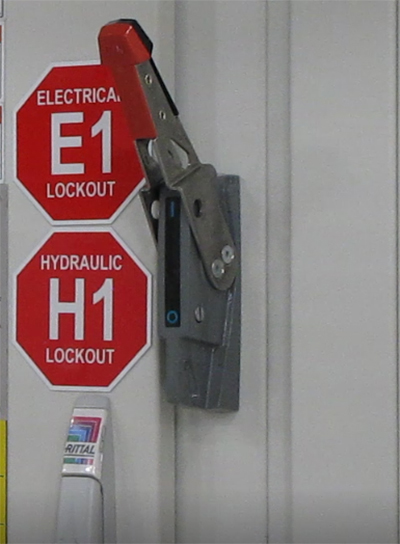
Machine switched on at main switch. Step 2:Ensure that the loading hatch in the work area hood is closed. Step 3:
Unlock and open the work area safety door. Step 4:
Position padlock at angle sheets on guard panels and work area safety door and lock. Step 5:Do not remove padlock before the end of work and before the work area is vacated. Securing Maintenance Area Safety Door to Prevent ClosingAs long as the maintenance area safety door is not locked, the motors cannot be switched on. The escape button on the inside of the safety switch services as an escape release in case of emergency. When this button is pressed, the machine is brought to an EMERGENCY Stop and the maintenance area safety door is unlocked. Step 1:
Machine switched on at main switch. Step 2: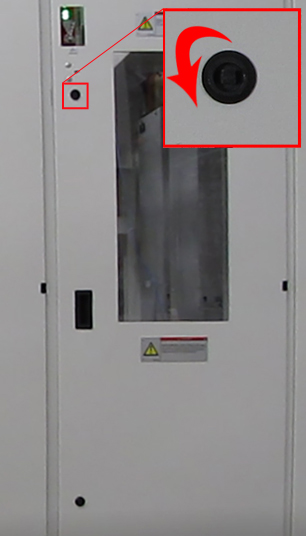
Unlock maintenance area safety door by twisting the casement fastener. Step 3: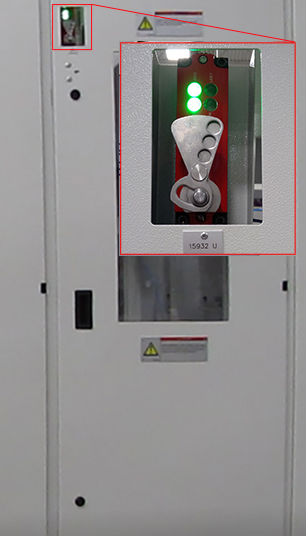
Unlock safety switch and open maintenance area safety door. Step 4: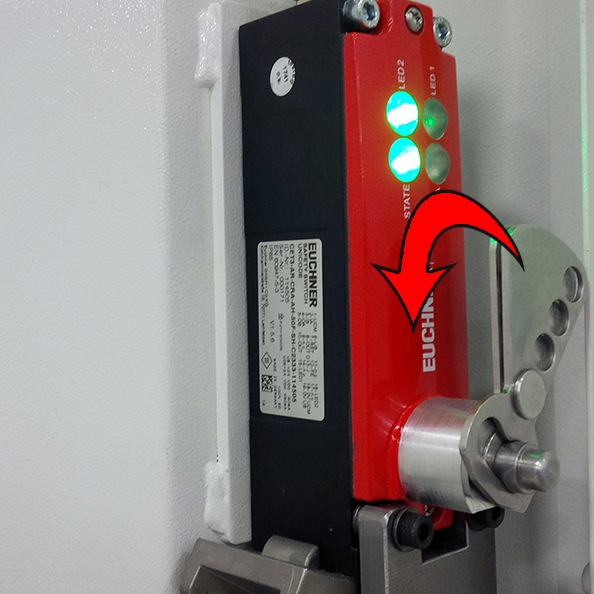
Press the push button and line up the holes in the two levers. Step 5: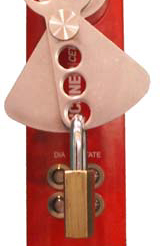
Hook padlock into lock insert and lock. The tumbler is not activated. Do not remove padlock before the end of work and before the work area is vacated. Step 6:
On completion of work:
Securing workpiece setting station safety door (front door) to prevent closingAs long as the safety switch of the workpiece setting station safety door (front door) is not locked, the motors cannot be switched on. Step 1:
Machine switched on at main switch. Step 2:Ensure that the loading hatch in the work area hood is closed. Step 3:
Open maintenance opening 2 at workpiece setting station. Step 4:
Unlock the workpiece setting station safety door (front door) by rotating the casement fasteners. Step 5: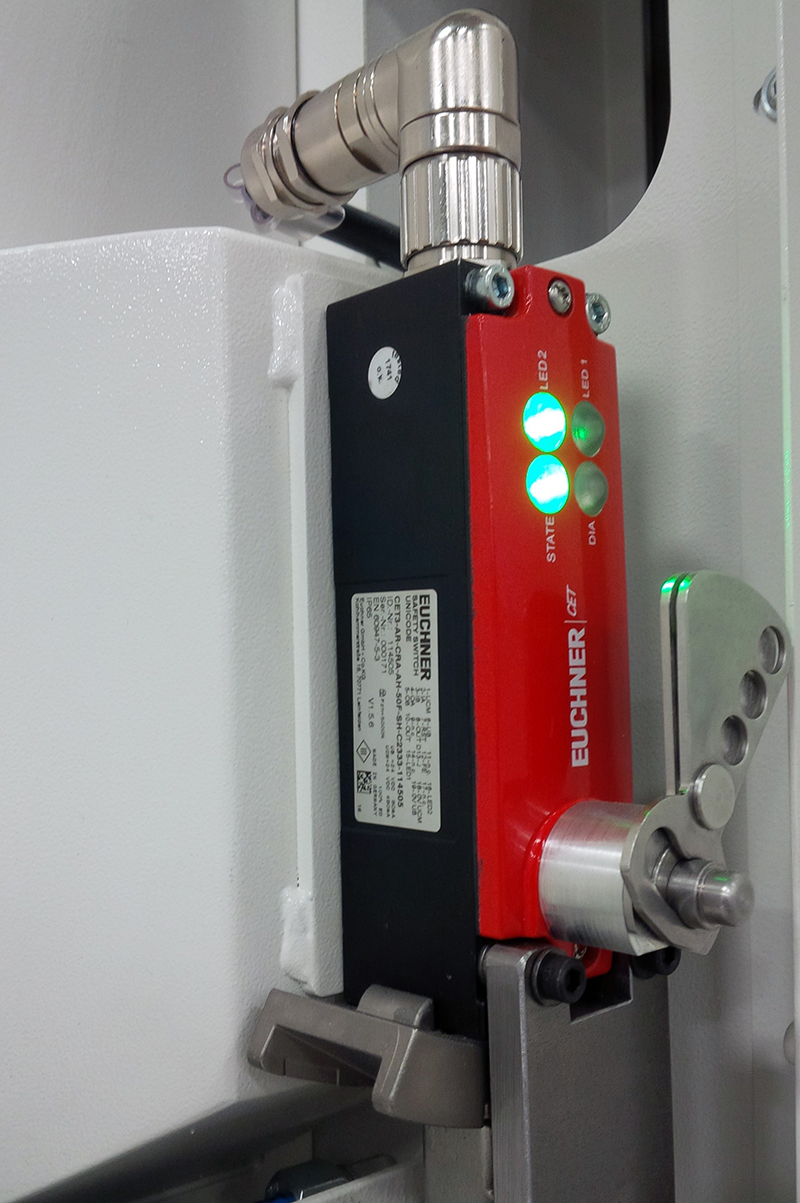
Unlock safety switch and open workpiece setting station safety door (front door). Step 6:
Press the push button and line up the holes in the two levers. Step 7:
Hook padlock into lock insert and lock. The tumbler is not activated. Do not remove padlock before the end of work and before the work area is vacated. Step 8:
On completion of work:
Step 9:
Close and lock the workpiece setting station safety door (front door). Step 10 :
Close maintenance opening 2 at workpiece setting station. Securing tool setting safety door to prevent closingStep 1:
Machine switched on at main switch. Step 2: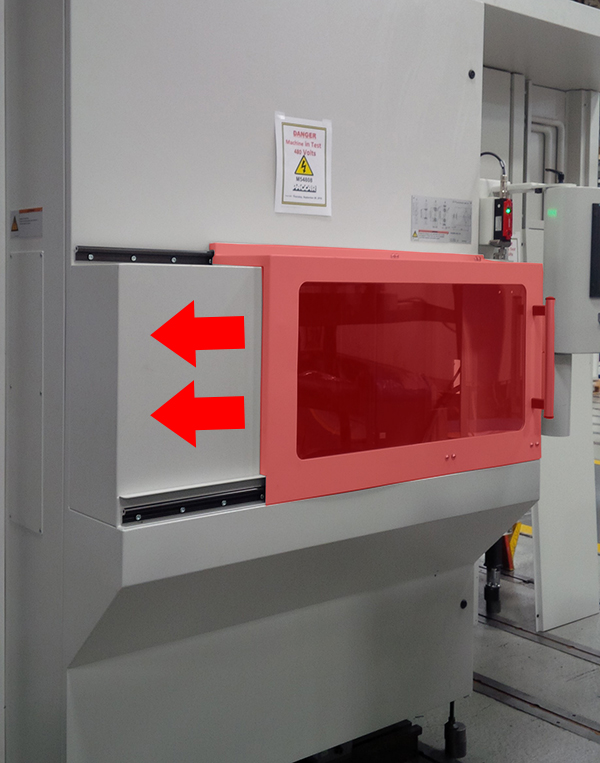
Unlock safety switch and push the tool setting station safety door to the left. Step 3:
Press the push button and line up the holes in the two levers. Step 4:
Hook padlock into lock insert and lock. The tumbler is not activated. Do not remove padlock before work is complete. Step 5:
On completion of work:
Step 6:
Close and lock the tool loading station safety door. Securing main switch to prevent it being activatedMaintenance openings that can be opened using a tool, are not electrically monitored. Moving machine components are released when maintenance openings are opened. Persons in the danger zone may be seriously injured by moving machine components. Before the maintenance opening is opened, the main switch must be switched off and secured to prevent being re-activated. It must be impossible to switch on the machine while persons are in the hazard area. Procedure Turn off machine at the main switch. Hook padlock into main switch and close. Do not remove padlock until all maintenance openings are closed. |