Check Filling Level in Cooling UnitInterval Component 200 Hours Operating time Cooling unit
Small quantities of cooling water can be lost from the cooling circuit through evaporation. Losses amounting to several litres per week, however, indicate leaks.
For manufacturer's documentation on the cooling unit, see Subsuppliers' Information (ZI) from "BKW".
For structure of the cooling unit, see the media diagram (MP). Procedure Check level at the filling level indicator. If the filling level has decreased substantially since the last inspection, the hydraulic equipment must be checked for leakages.
For procedure see: "Inspection of Fluid Equipment" If the cooling water level is below the centre of the min-max range, top up cooling water.
For procedure see: "Replenish Cooling Water" 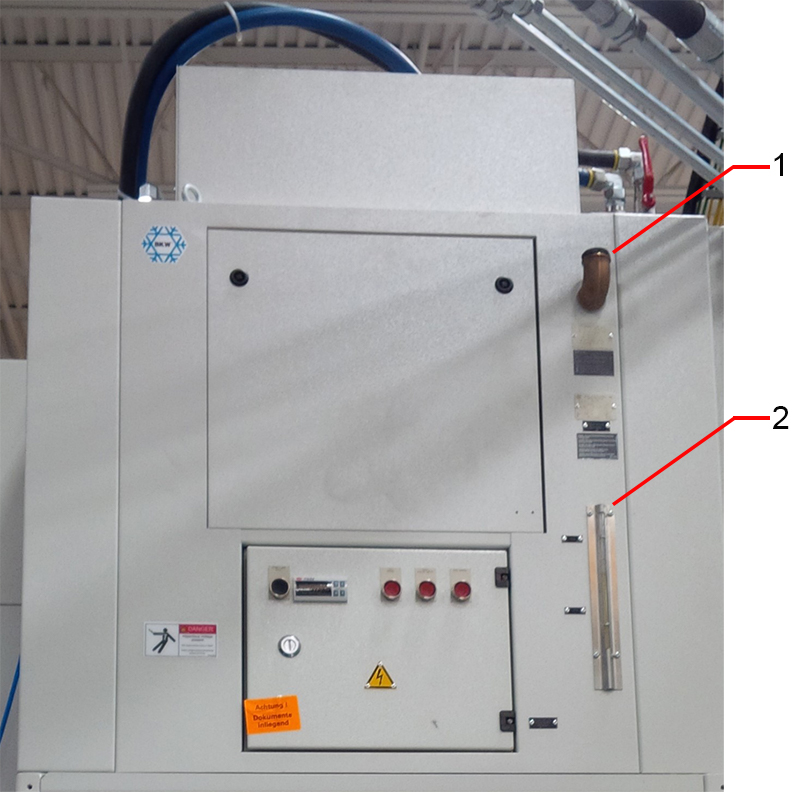
Replenish Cooling WaterCooling water:
The proportion of Antifrogen N in the cooling circuit must never drop below 20 % ! Below 20 % ,the anti - bacterial effect is reversed and bacteria can multiply extensively in the cooling circuit. Always keep the mixing ratio within the following limits:
Determine the mixture ratio in the cooling circuit using a frost protection tester before toppingup the cooling water and depending on the test result, add pure Antifrogen N, a mixture or pure water. This procedure is described below. Handling demineralised water and auxiliary materials:
Safety precautions for Antifrogen N:
Ladder Clean glass for collecting cooling water sample Clean anti-freeze tester for Antifrogen N, HELLER No.01.019174 Clean vessel for preparing the mixture Clean equipment for filling (jug, funnel) For safety data sheet on anti-corrosion agents, see Subsuppliers Information (ZI) from "Clariant". Procedure Fill with cooling water through the filling opening up to the maximum mark on the filling level indicator. Screw on filling opening cover. Operate the machine for 1 hour to mix the cooling water. Check the mixing ratio again and adjust as necessary.
Taking Cooling Water SampleStep 1:
Maintenance area / safety door opened and secured to prevent closing. Step 2: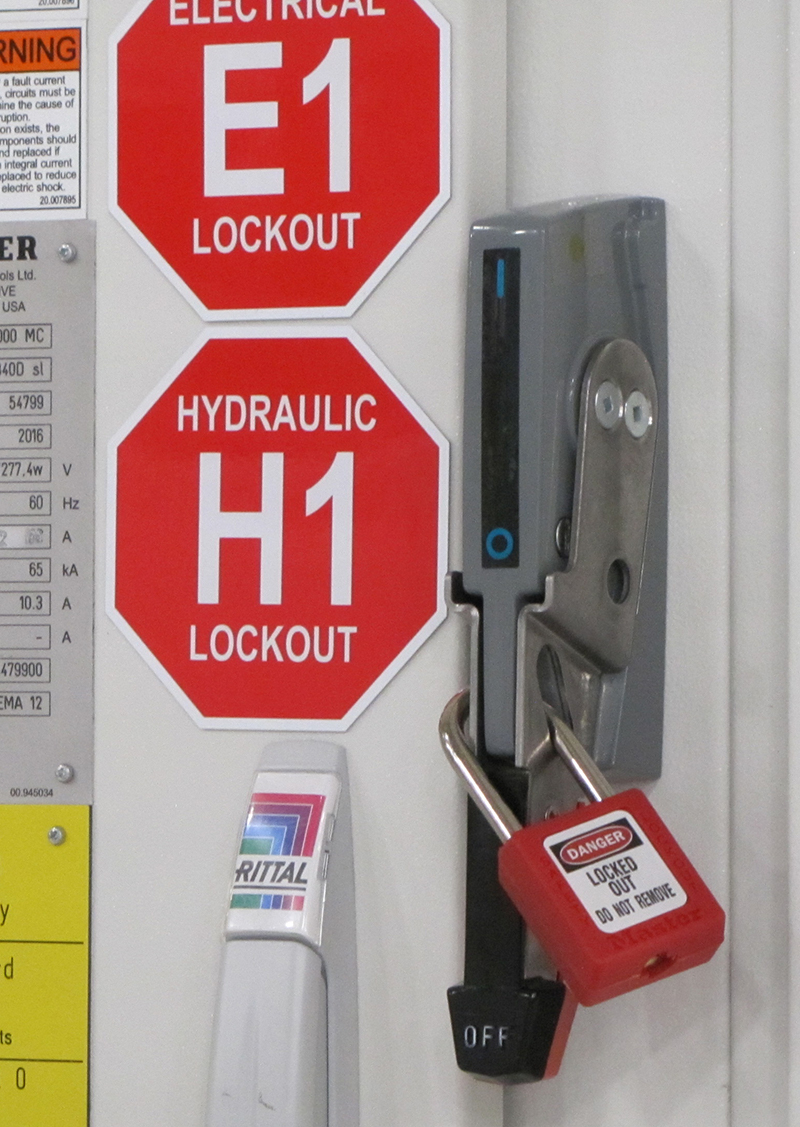
Machine switched off at main switch and secured against being switched on again. This switches off the cooling unit. Step 3:
Unscrew cover on filling opening.
Step 4: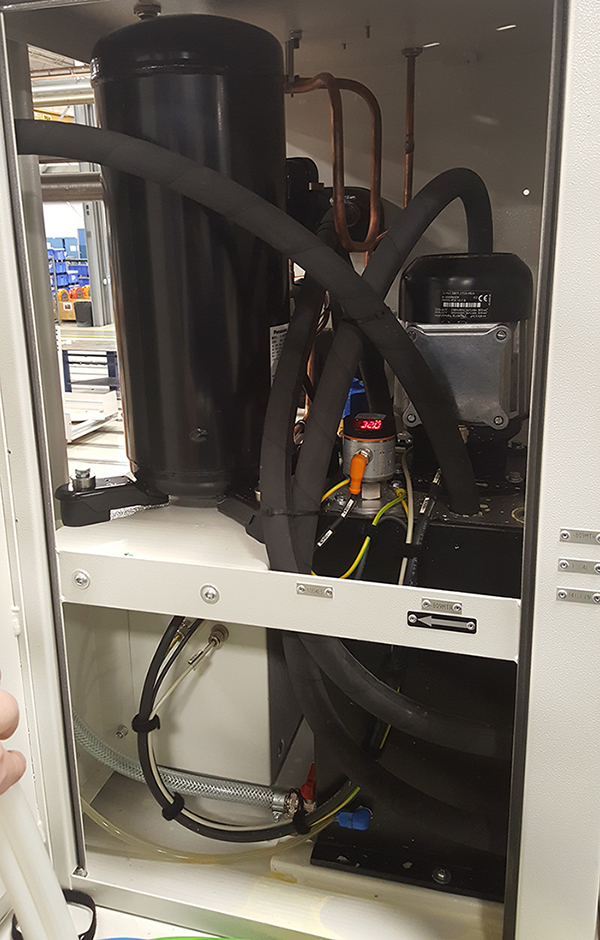
Unlock side panel of cooling unit (2 locks) and remove. Step 5: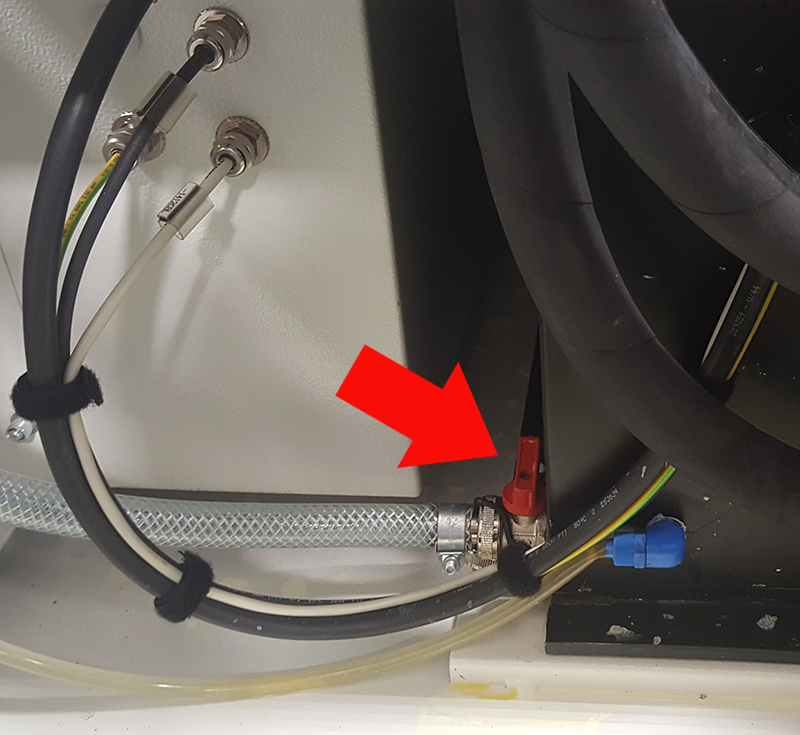
Remove safety cap from hose. Guide the hose into a glass beaker. Open the drain cock and remove approx. 100 ml cooling water.
Step 6:
Close drain cock and seal the end of the hose with the safety cap. Place the hose inside the cooling unit. Attach side panel of the cooling unit. Determine Mixture RatioStep 1: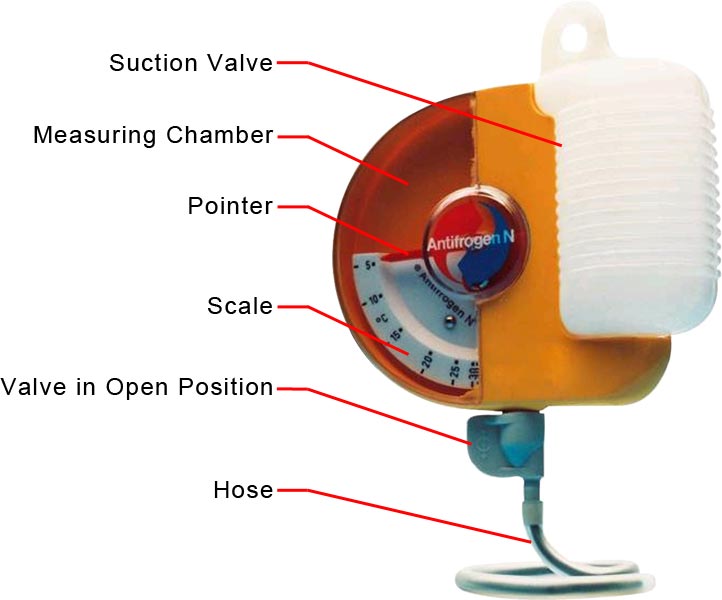
Fill anti-freeze tester:
Step 2:
Any air bubbles that have formed can be removed by tapping your finger lightly against the measuring chamber.
Step 3:
Read off measuring result.
Step 4:
Drain the anti-freeze tester into the glass:
Step 5:
Clean the anti-freeze tester by repeatedly sucking up and pumping out warm water. Step 6:
Empty glass and clean with warm water. |
||||||||||||||||||||||||||||||||||||||||||||